[vc_row][vc_column][vc_column_text]It is not that difficult to zero your optic correctly. After 15 to 20 shots, you should already get a very good result.
In this short tutorial I would like to show how how to zero your optics the right way (Red Dot, LPVO, Scope).[/vc_column_text][vc_separator][/vc_column][/vc_row][vc_row][vc_column][vc_column_text]
Preparation: hitting the target
Sounds very trivial, but first of all set your sights roughly so that you can hit the target from the desired distance. It doesn’t matter whether you want to zero a red dot, LVPO or scope, the procedure is always the same.
If you don’t have a target, there are more than enough download options or some from Copper and Brass via this link.[/vc_column_text][/vc_column][/vc_row][vc_row][vc_column][vc_separator][/vc_column][/vc_row][vc_row][vc_column][vc_column_text]
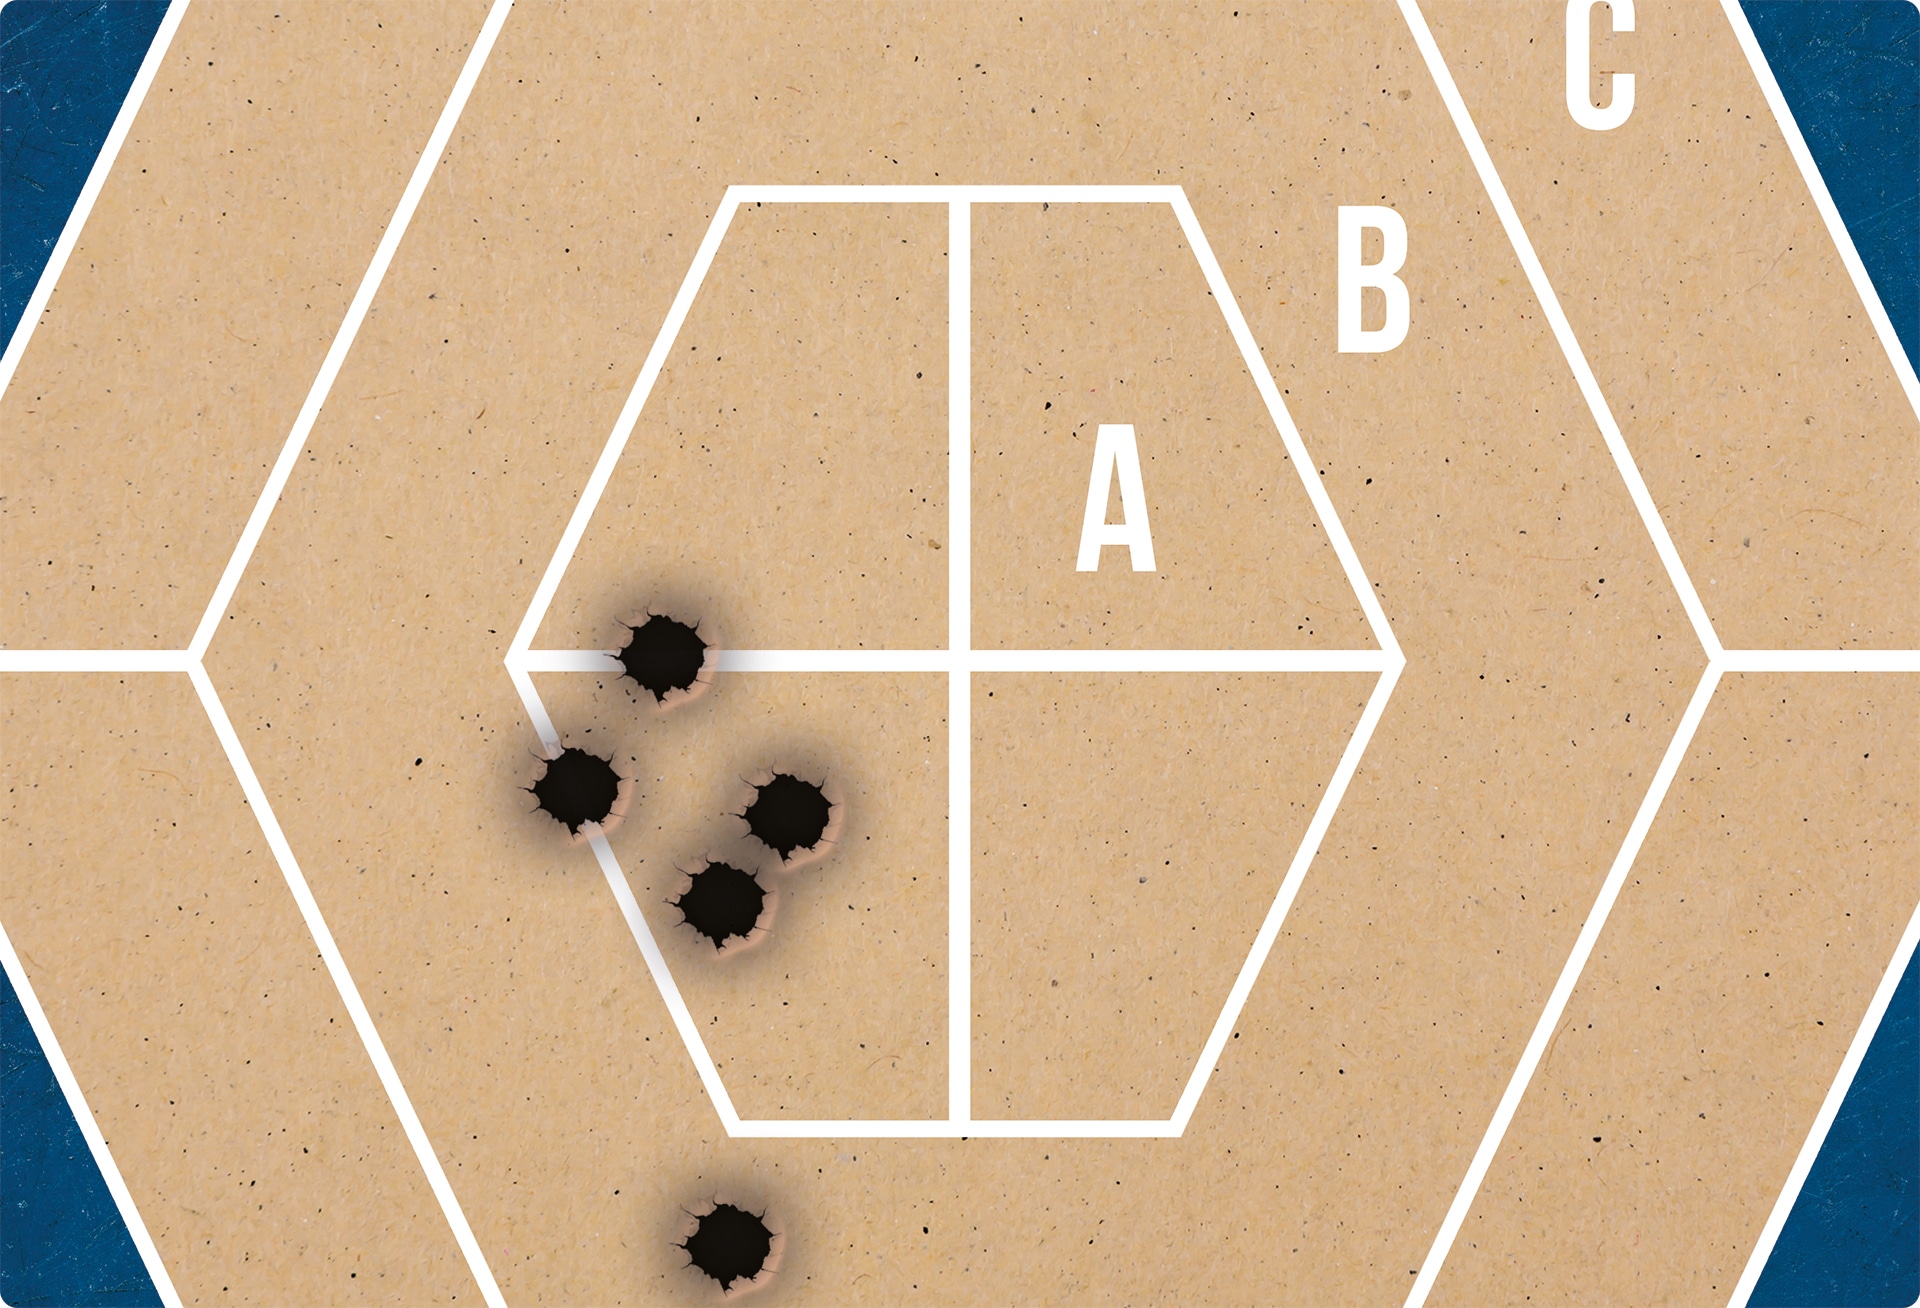
Step 1: Fire 5 shots at the target
Aim directly at the center of the target. Take enough time to calmly fire all 5 shots in succession.
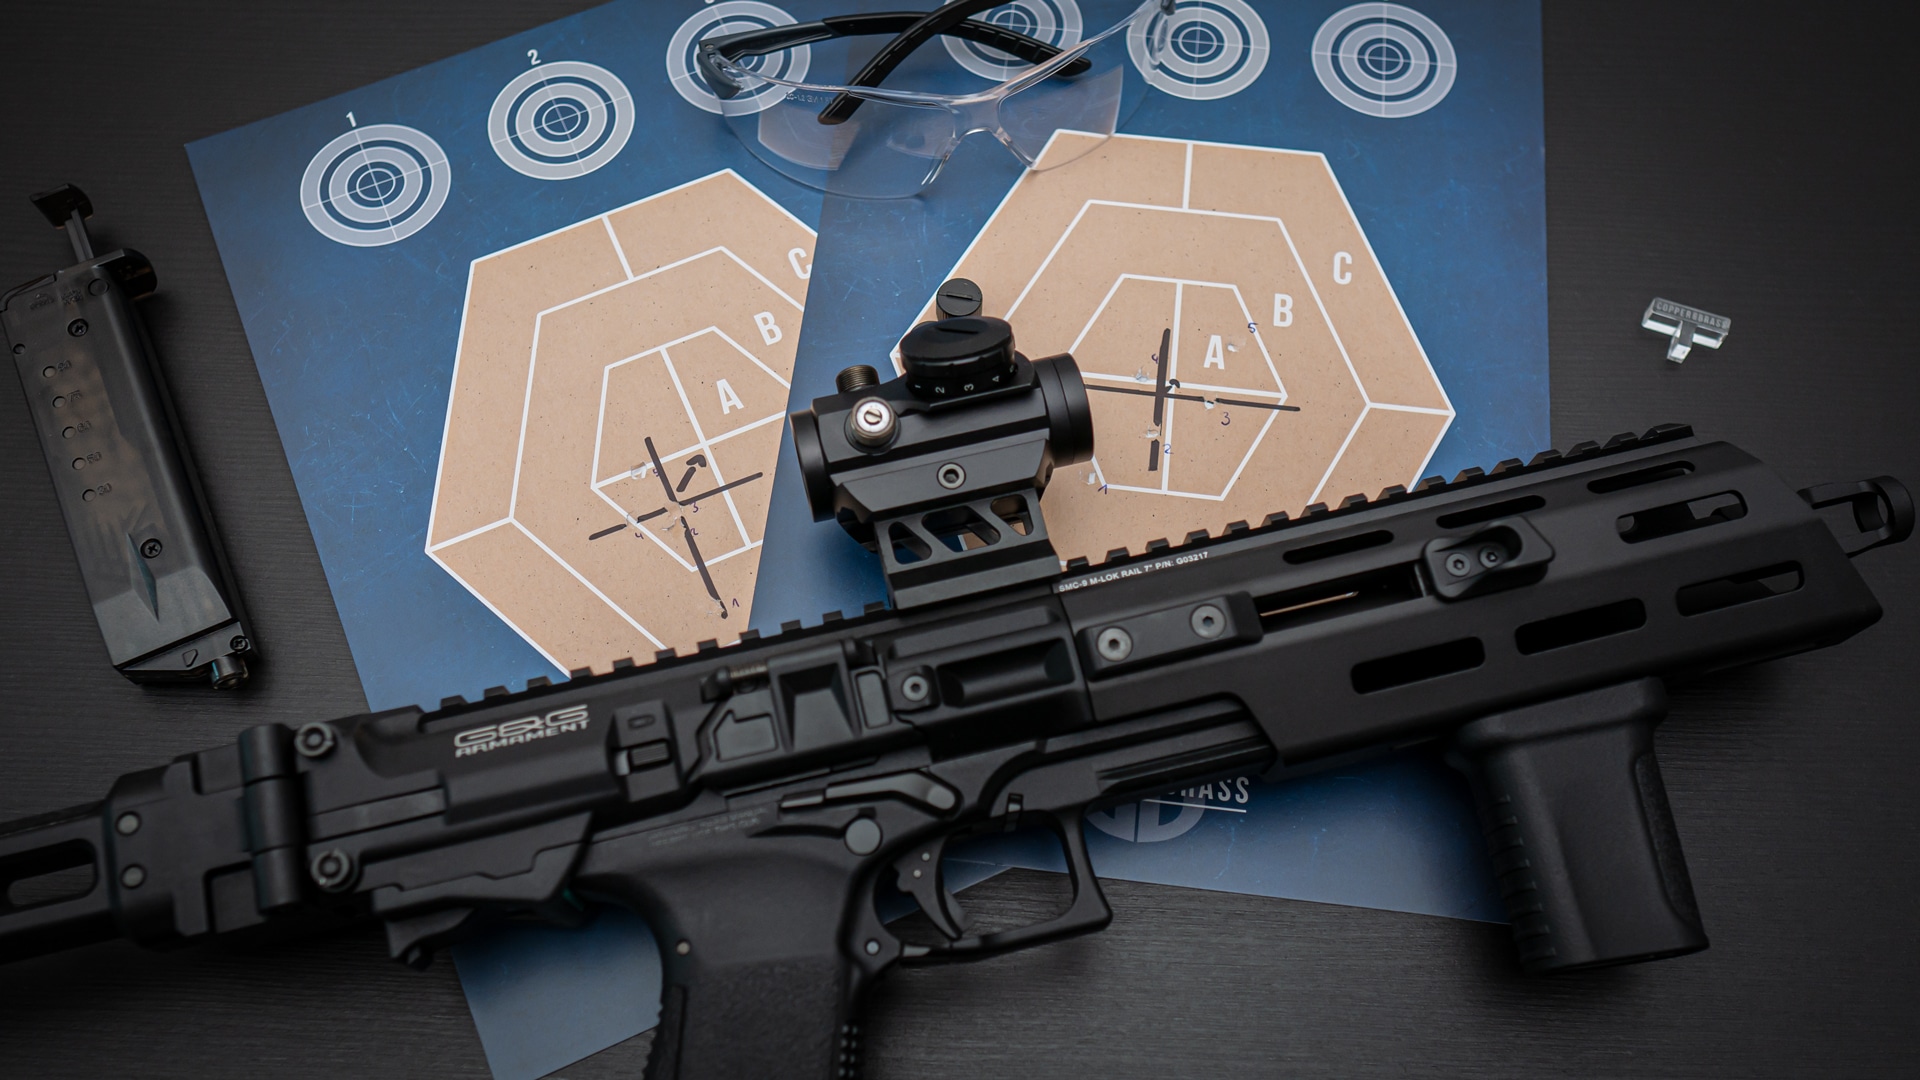
For this example, I shot my G&G SMC9 at 10 yards with a simple Red Dot. At this distance my zero is supposed to be for Airsoft CQB fields. I want to have my zero at this short distance to achieve “when it’s red it’s dead”. The distance can of course vary for you and depends on the purpose of your weapon.
Now you get a hit pattern that looks like this or something similar.
 [/vc_column_text][vc_separator][/vc_column][/vc_row][vc_row][vc_column][vc_column_text]
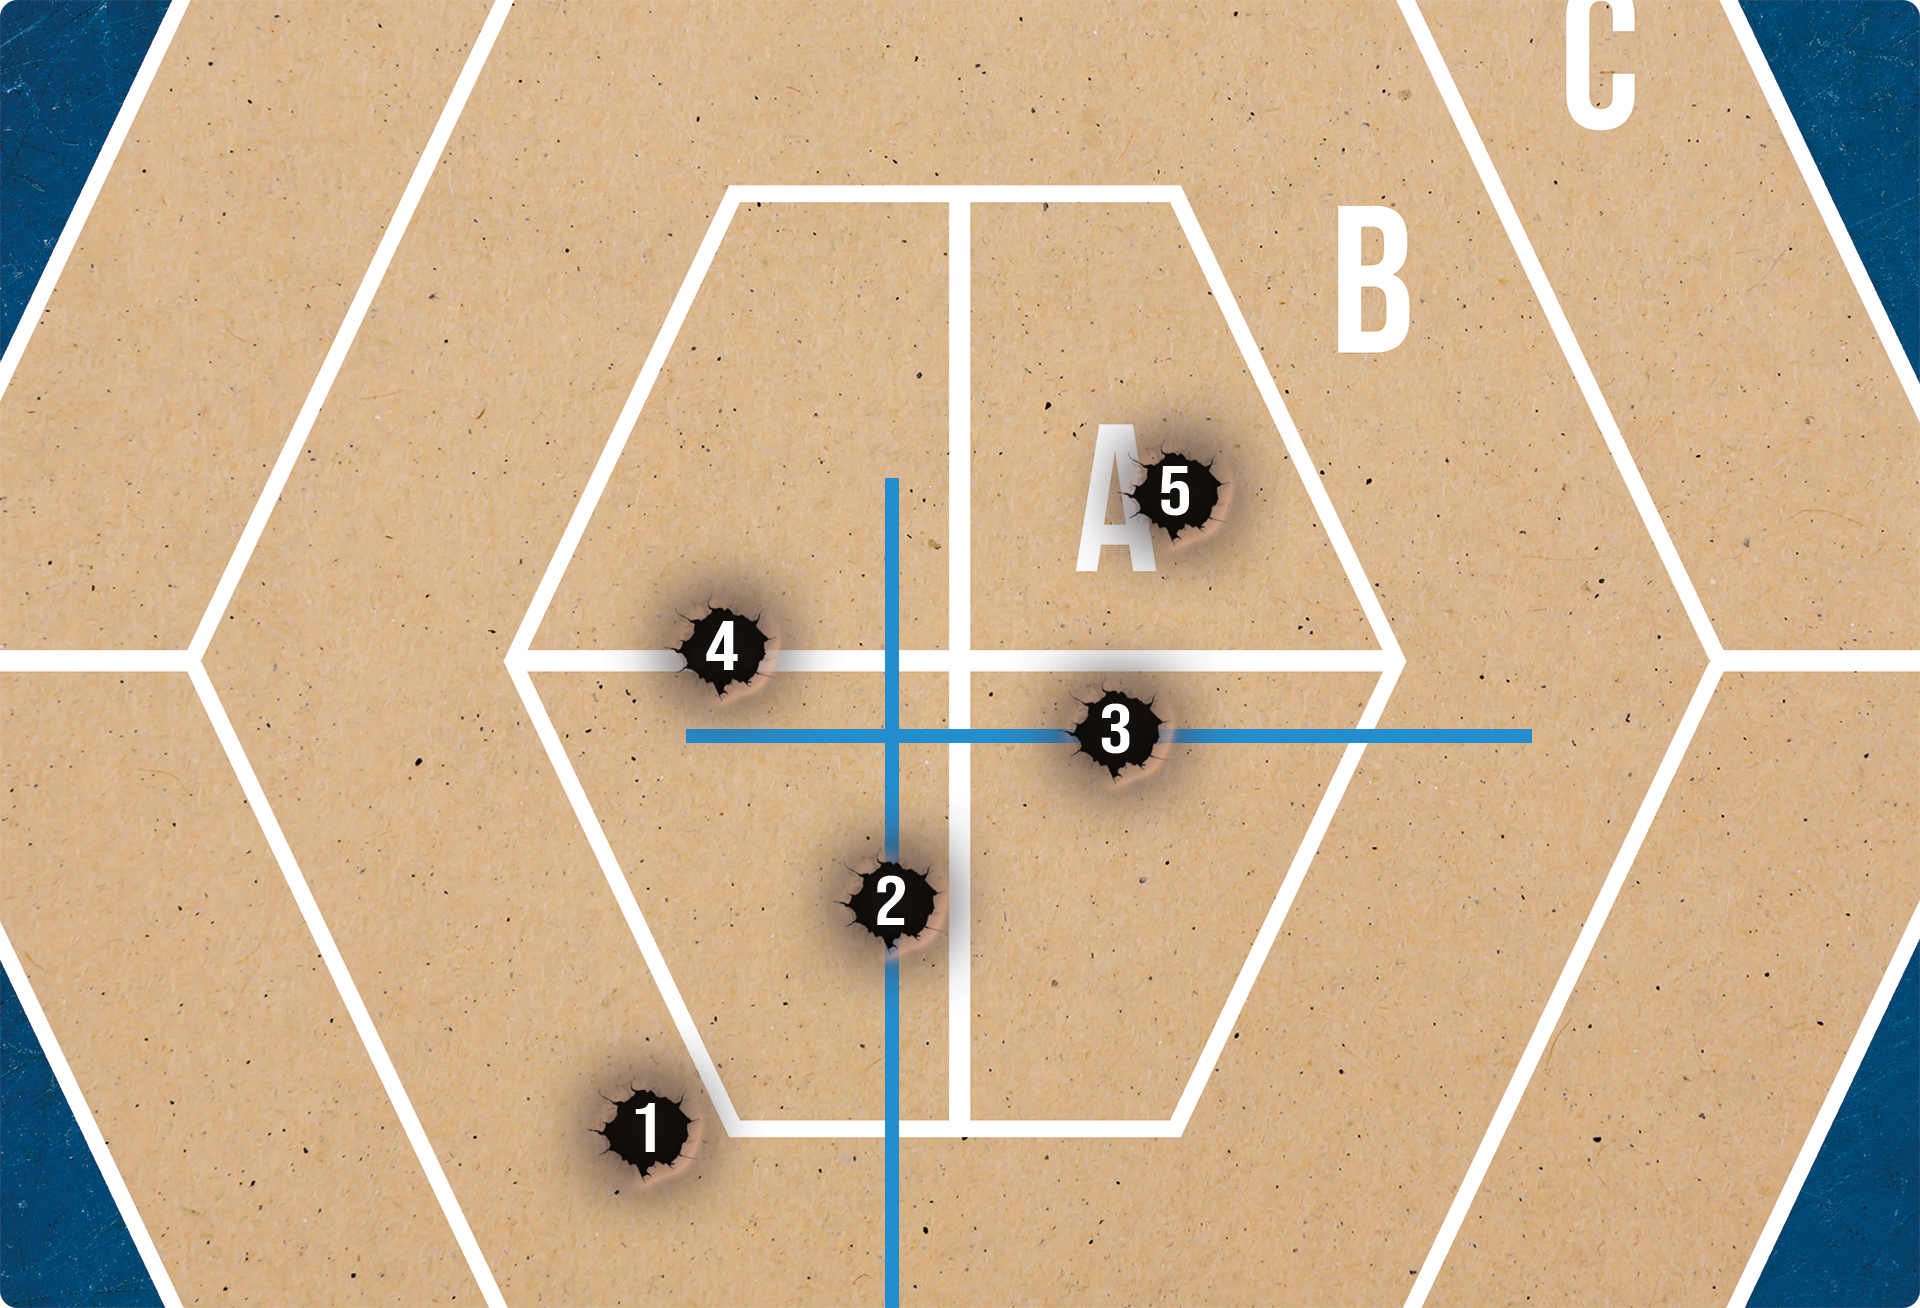
Step 2: Find the third hit in each direction
Mark the 3rd hit from the top or the bottom. Because you have fired 5 shots, it doesn’t matter in which direction you count. At the height of the third hit, draw a horizontal line with a pencil.
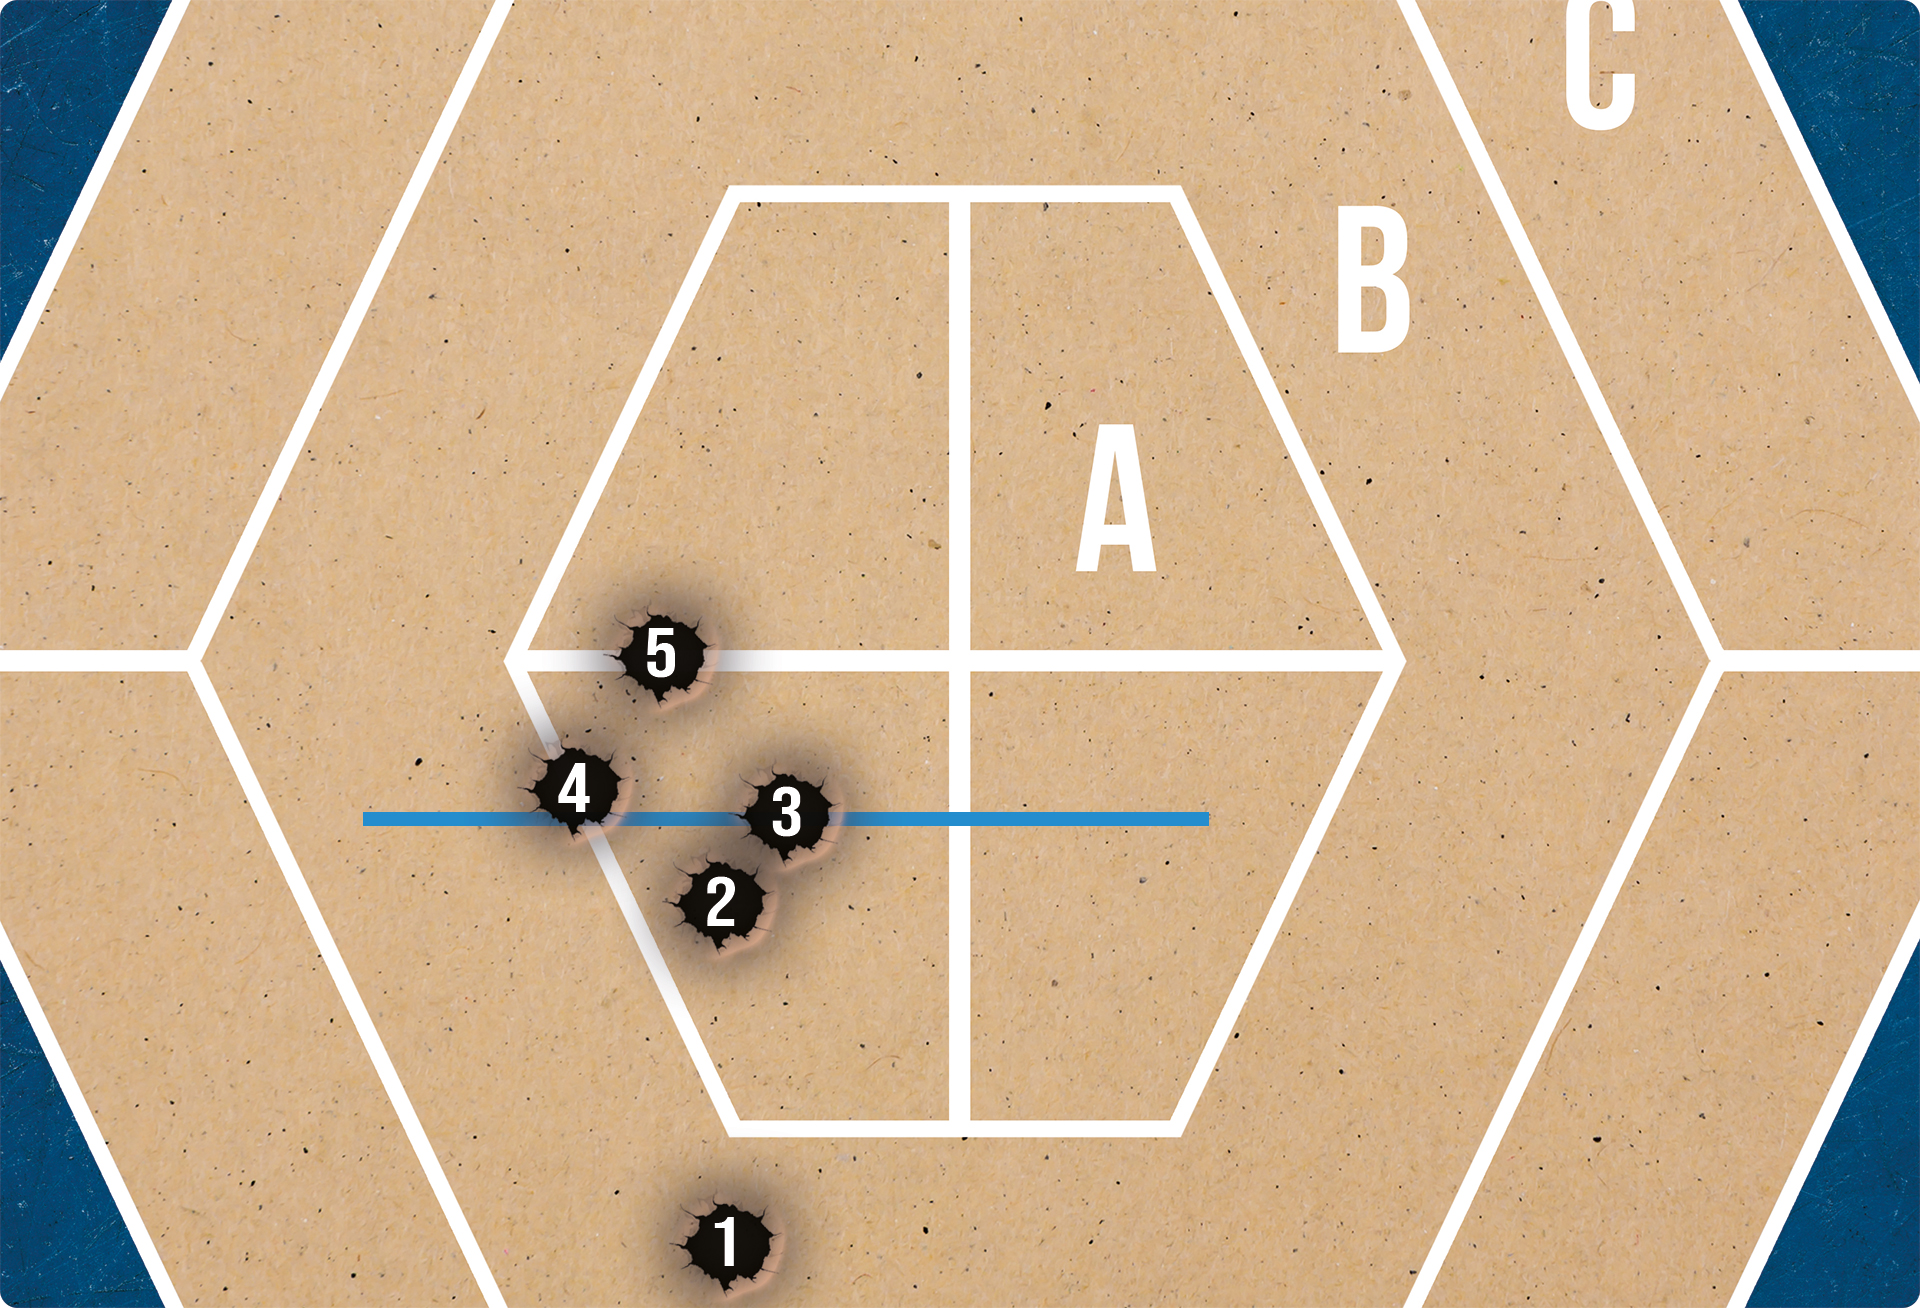 [/vc_column_text][vc_column_text]Now mark hit #3 from left to right or right to left. It doesn’t matter where you start, from both sides the third hole is in the same place.
 [/vc_column_text][vc_column_text]At the height of the third hit, draw a vertical line so that both lines meet.
The intersection of these lines is a good orientation in which direction you can adjust your optics. In my case, it is a little too far down and too far to the left. So correct your settings on the dials in the direction you need your red dot to go.
[/vc_column_text][vc_separator][/vc_column][/vc_row][vc_row][vc_column][vc_column_text]
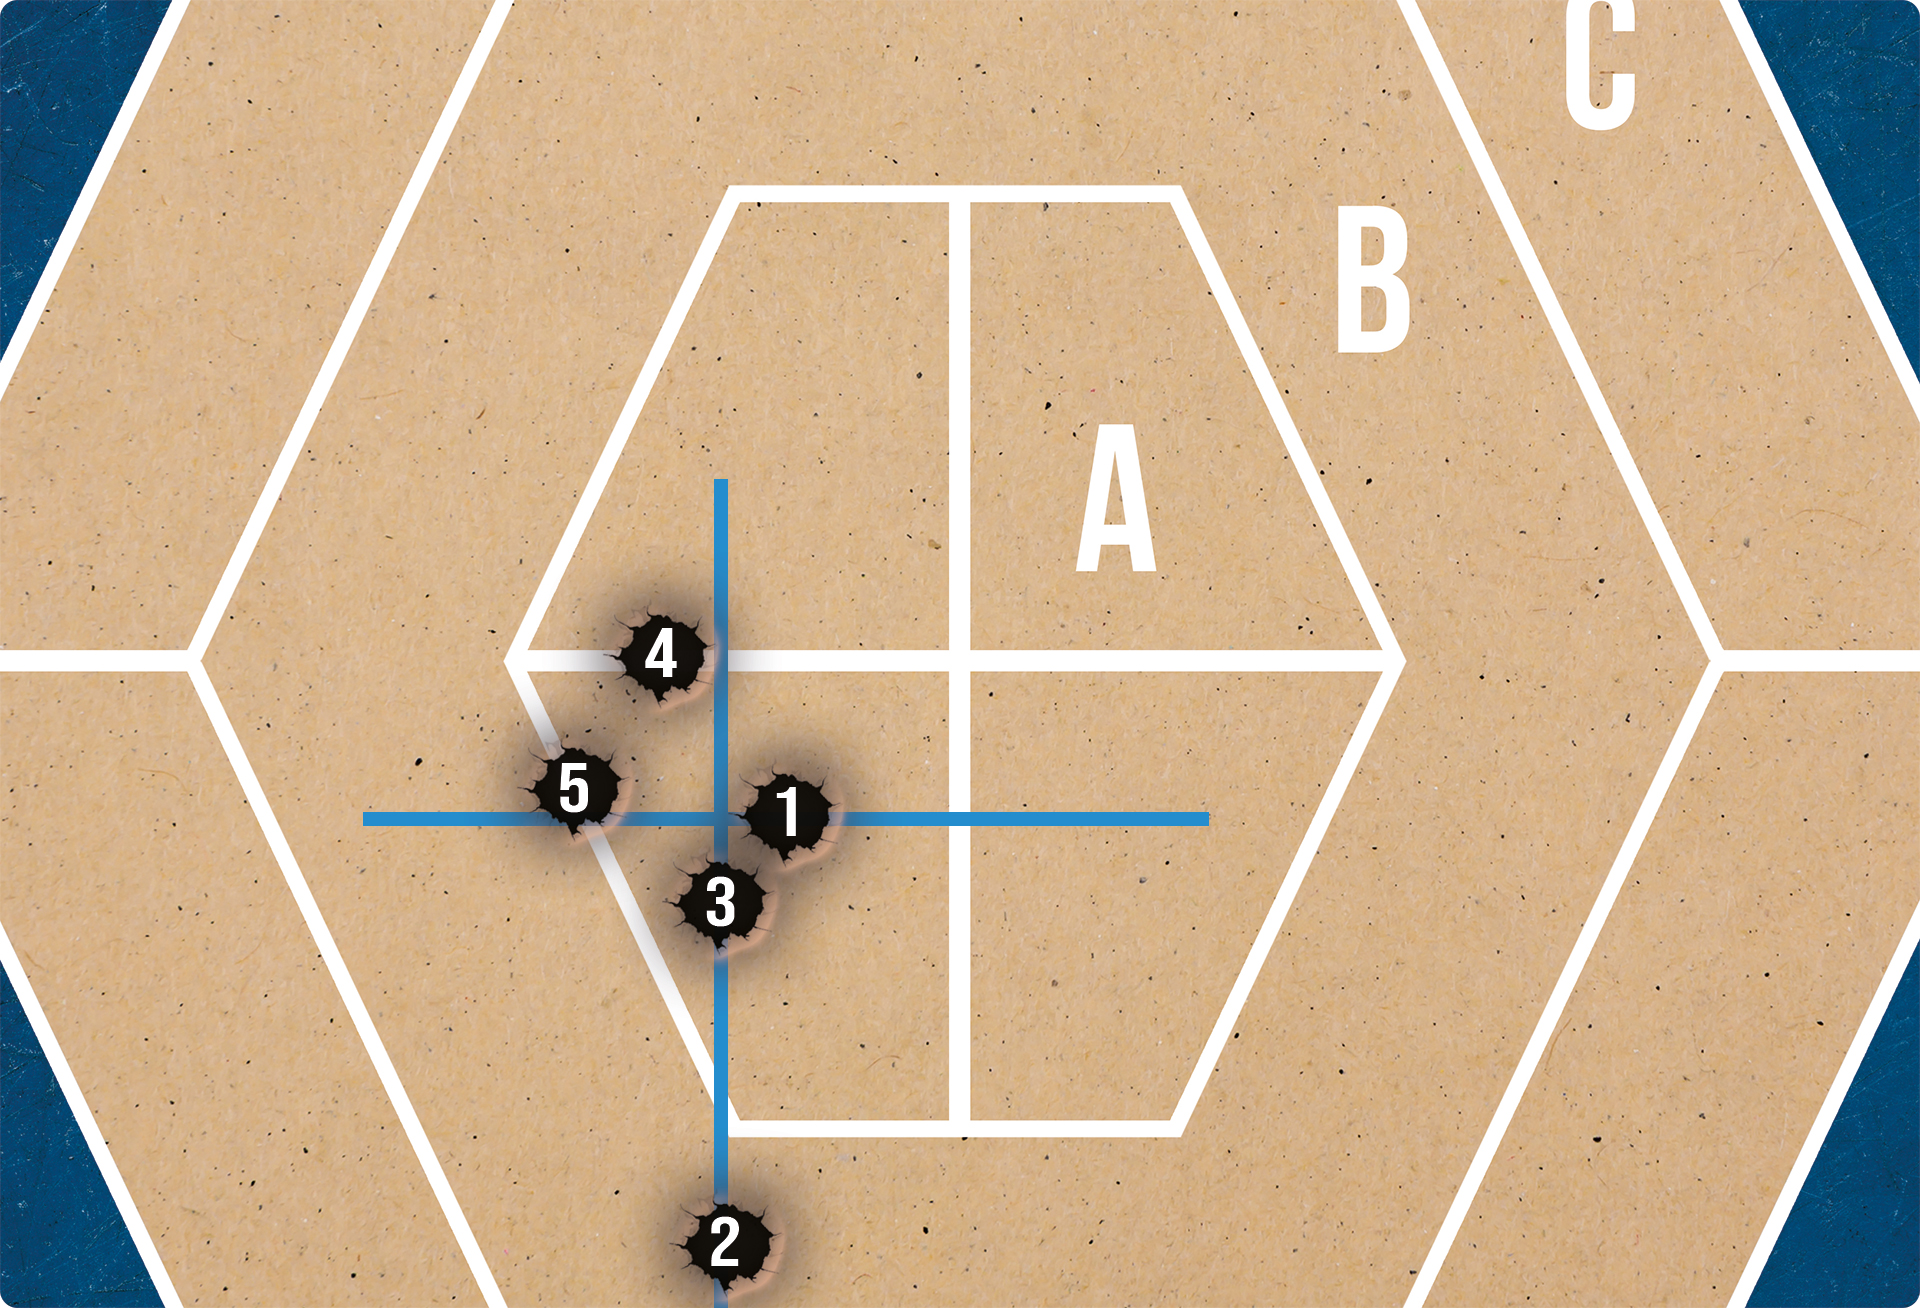
Step 3: Fire 5 shots again with your new settings
Now go back to your firing position and aim again exactly in the center of the target and fire 5 precise shots. Your hit pattern, or rather your zero should be a little better now.
Here is an illustration of my second attempt:
 [/vc_column_text][vc_column_text]And yes, the group is a bit larger than the first run, but that doesn’t affect the fact that you can still finetune your Zero even better now.
Search again from above / below as well as left / right the third shot. In each direction draw the horizontal and vertical axis.
 [/vc_column_text][vc_separator][/vc_column][/vc_row][vc_row][vc_column][vc_column_text]
The reason why I use this method
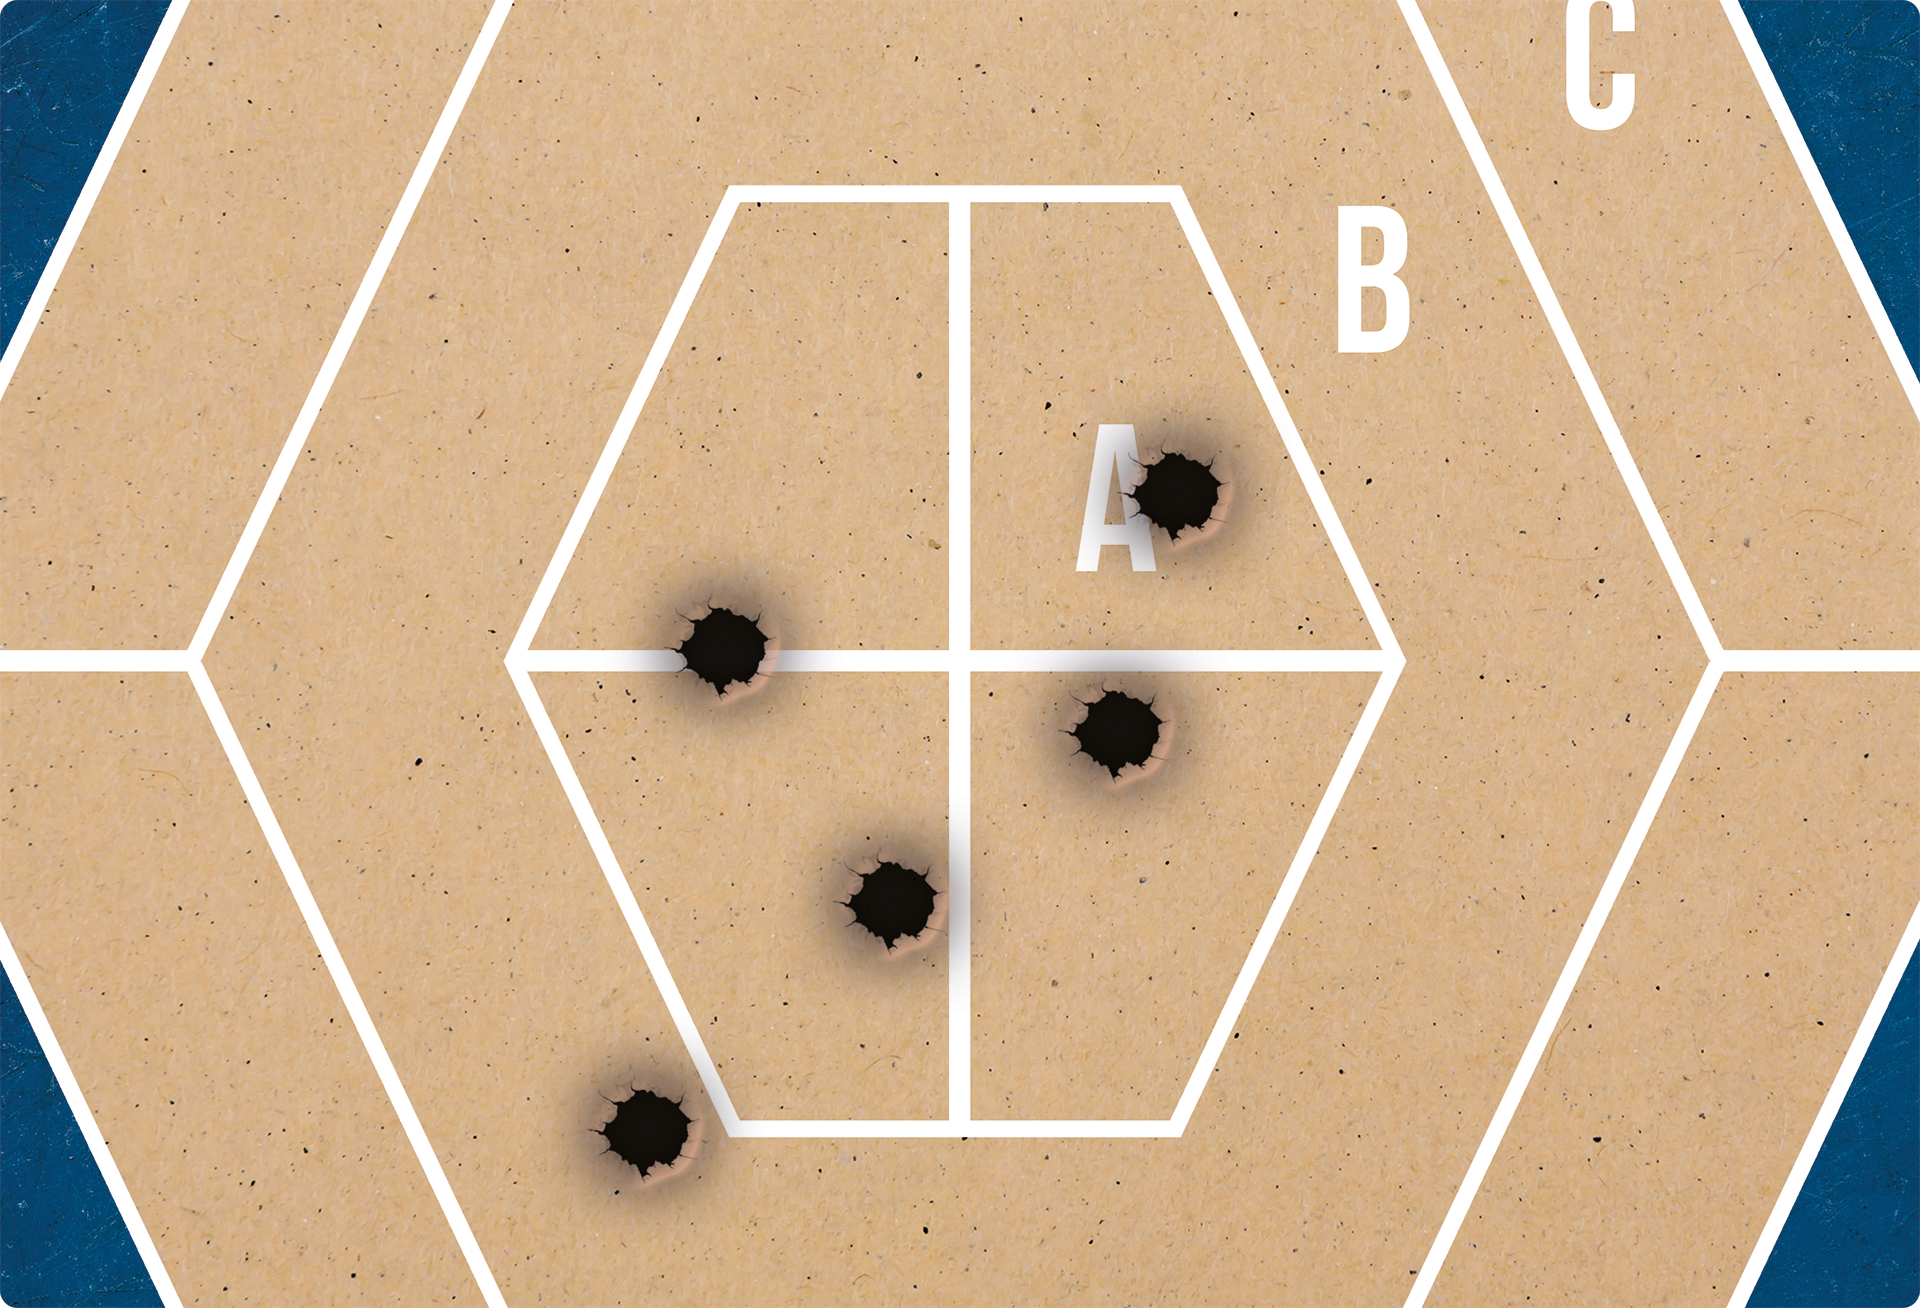
As you can see from the picture of the second pass, the hit pattern (or rather the grouping) is not as good as the first pass.
However, if you set your sights using this method, outliers will almost have no impact on your setting decisions. By always taking the third hit, a hit further away from the group is automatically not taken into account.
For this reason, you get a very meaningful picture of your setting without being distracted by flyers. And as you can see, it’s not important to shoot a perfect group either, because from step 1 to step 3, the intersection is already much closer to the center, so I made the adjustments in the right direction.
After only two runs, I am very happy with my zero. Adjusting the red dot to within about 1 to 2cm at 10 meters is more than sufficient. At this distance the target area is obscured by the dot anyways. And I don’t want to rule out the possibility that the grouping size is due to my skills rather than the settings.
Here again the picture of the actual results I could achieve within 5 minutes.
[/vc_column_text][/vc_column][/vc_row]